When you have a multi-level home, venting the first-floor bathroom can come with its own particular challenges.
Installing a bathroom exhaust fan on the first floor of a home is similar to most bathroom fan installations. However, there are some challenges with venting the first-floor bathroom as you need to pass through the home’s upper level to achieve outside ventilation. You may have to abide by specific building codes.
Having proper ventilation in your first-floor bathroom can be easy to do if you follow the building codes and use efficient installation techniques.
Don’t let the challenges of first-floor installation hold you back, read on to learn how to install a bathroom exhaust fan on a lower level.
How to Vent 1st Floor Bathroom
The first thing you should look into is the building code regulations in your area.
Building codes change depending on where you live.
Some concerns with building codes are the size of your fan in relation to the room and the length of your ductwork.
One thing with bathroom ventilation that is very widespread is that a bathroom needs to be vented outdoors.
Venting into the attic or any room upstairs usually results in a violation.
Therefore, outdoor ventilation can be a challenge for a first-floor bathroom.
Instead of going straight up to the roof, your ventilation will have to pass through a second or third level full of other rooms to reach the outside.
Depending on where your bathroom is located, this job can be more simple or quite challenging.
Often when you have a bathroom connected to an exterior wall, the easiest route is to vent through that wall instead of going through the roof.
Usually, a wall-mounted fan will be your best option. But if your bathroom has no exterior walls, you have a more difficult task ahead of you.
How to Install a Bathroom Fan on the 1st Floor
Tools You Will Need
- Screwdriver
- Drill
- Handsaw or Jigsaw
- Reciprocating Saw
- Marker
- Eye Protection
- Duct Tape
- Cardboard
Step-by-Step Guide
1. Evaluation and Planning
To begin the process, take a look at your bathroom and create a plan to ventilate it outdoors.
For example, if your bathroom has an exterior wall, then you can easily achieve ventilation that way. If not, you will need to use a ceiling fan.
Next, you will have to look at what room is above your bathroom and see if you can get your ductwork through the walls of the room or rooms above to reach the roof.
Finding the best ductwork path through a multiple-level home can be daunting, and you may need to consult a professional.
Before you begin any work, check with your local building code authority to make sure everything you are doing is legitimate.
2. Making the Cuts
Whether cutting through the ceiling or wall, you will want to use cardboard and trace the outline of your bathroom fan onto it to create a template.
Then attach the template to your ceiling or wall with tape.
Follow the template in your bathroom to make your cut using a handsaw or jigsaw.
Take extra care to follow the lines and not make the hole too large.
Also, beware of any wiring or plumbing that you may find in your ceiling or wall.
Then using your vent cover, you can make the cut on your exterior wall or the roof.
You can create a template for the vent cover and cut the hole with a reciprocating saw using a blade made for the material you are cutting through, such as plaster.
3. Routing Ductwork and Attaching the Fan
Connecting ductwork for a wall-mounted bathroom fan is an easy process as it will travel a short distance through your wall to your outdoor vent.
For the ceiling vent, you will have to route the ductwork through the ceiling and walls above on the path you previously decided on.
You may have to cut an additional hole upstairs to achieve your routing.
Consulting a professional for this part of the job may be best.
In either case, with your ductwork routed, you will need to connect it from the outside vents ductwork to the flashing and do the same on the inside ductwork that will connect to the fan.
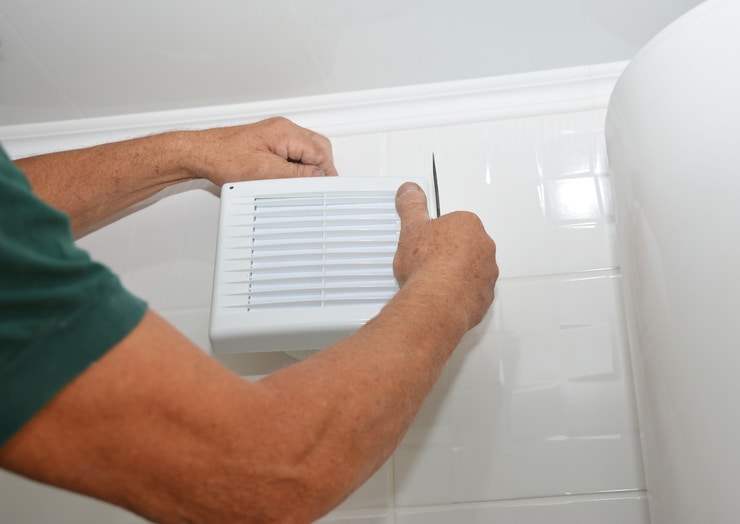
You then need to install the fan’s housing by following the manufacturer’s instructions which usually involve drilling the fan’s housing into the ceiling or wall and then attaching the fan to the housing.
4. Electrical & Wiring
At this point in the installation, the differences between a ceiling or wall-mounted fan begin to fade.
Before doing any electrical work, make sure the electricity to your home is cut off through the breaker box.
Your fan will have a wiring diagram you should follow.
But in most cases, it involves connecting wires of the same color from your bathroom fan to your home’s electrical system.
This is usually accomplished by running wires from your bathroom fan to the breaker box.
You can then firmly attach these wires with a screwdriver.
Make sure all your wires are connected, and your electrical work is done before turning back on your home’s electricity.
5. Final Steps and Testing
With the installation nearly complete, you’ll have a few more things to wrap up.
You’ll need to attach your outdoor vent along with your bathroom fan’s cover.
Then any cleanup that is needed from drilled holes.
Then test and run your fan, and you should have a new running bathroom fan to ventilate your first-floor bathroom.
If your bathroom fan does not turn on, you may need to go back over your wiring to ensure everything is connected properly.