As the popularity of pebble shower flooring grows, more DIY’ers are wondering if this is a task they could take on themselves?
Installing river rock flooring is similar to installing ceramic tile, with the exception of there being more work. There are more stones to layout, and the grout may be tougher to install. But essentially, the installation of a pebble stone flooring is not radically different from installing any shower floor.
This article will guide you through the process, from choosing the type of pebbles that best suit your needs to a detailed step-by-step guide to assist you through the installation process.
Types of Pebble Tiles
There are three general classifications of pebble stone tile: standard pebble tile, sliced pebble tile, and stacked pebble tile. Each type of pebble tile carries its own look, style, feel, and purpose.
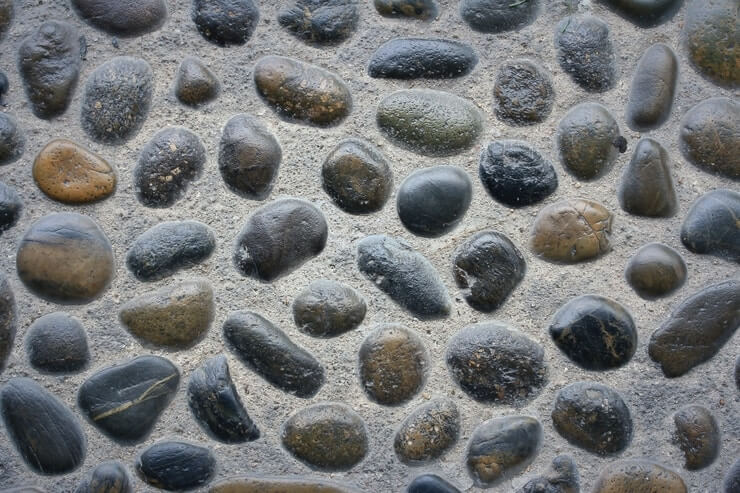
Standard Pebble Tile
Standard pebble tile is also known as basic pebble tile, is the most commonly used type of river rock flooring. Standard pebble tile is a natural stone that is rounded and uncut. This is the most widely used type of pebble tile and is known for its natural river bed look and its ability to massage your feet.
Sliced Pebble Tile
Sliced pebble tile is a natural stone and is a variation of standard pebble tile. Unlike standard pebble, tile sliced pebble has been cut to create a flat surface instead of the rounded surface found in standard pebble tile. This type of river rock flooring is great when a flat surface is necessary.
Standing Pebble Tile
Standing pebble tile, also known as stacked pebble or stone tile, uses larger stones than the standard or sliced varieties of river rock. These larger stones are cut in half, with the flat side placed on a mesh and the rounded side facing upwards. Standing stone tile is excellent when you want a raised floor with the same feel as standard pebble tile.
How to Choose the Right Pebble Tile for Your Shower Floor
Choosing the right pebble floor will depend on the look, feel, and types of stylistic options you prefer. Certain bathrooms and special needs will lend themselves to a certain type of river rock.
Any type of pebble stone flooring will be available in various colors and unique patterns to suit your personal tastes and the rest of the room. With that in mind, your choice may come down to whether you have a deep shower floor or would prefer a flat surface.
Sliced pebble tile is usually used for things like countertops where a flat surface is required, but it can work just as well in the shower. If you have extremely sensitive feet or the thought of a rounded massaging floor does not appeal to you, then sliced river rock is your best option.
On the other hand, if your shower floor is deeper than your bathroom floor or you want a raised shower floor, then standing pebble tile would serve you well.
If neither of the two situations above applies to you, then you’re probably best off with the original standard pebble tile.
Tools & Materials
- Thinset Mortar
- The Pebble Stone of your choice
- Trowel
- Sponges
- Clean Rags
- Buckets
- Grout
- Mixer
- Grout Float
- Kneepads (If desired)
- Gloves (If desired)
- Sealant
- Brush or Roller
- Duct Tape
Step-by-Step Installation Guide
Step 1
Begin by preparing your bathroom for the floor installation. Make sure your shower’s floor is clean and free of dust or debris. Use duct tape to cover your shower’s floor drain.
Step 2
Do a dry set or a mock-up of the pebble shower tiles. Lay them in the pattern that you like and change the design if you desire.
Step 3
Once you have a pattern that you are happy with, apply your thinset mortar using your trowel. Make sure not to apply the mortar any thicker than 1/8th of an inch.
Step 4
With your mortar applied, lay down your pebble tile, which usually comes in mesh sheets in the pattern you established during your dry run.
Step 5
If there are any gaps in your pattern, you can un-attach stones from the mesh sheets and use them to fill these gaps.
Step 6
You must then wait for your thinset mortar to harden. The manufacturer of your thinset will instruct you on how long you need to wait, but it is usually between 24 to 48 hours.
Step 7
Once your mortar has hardened, you may apply your first layer of sealant. Fill a container or small bucket with sealant.
Step 8
Use a brush or roller to apply your sealant thoroughly across your floor.
Step 9
You will need to wait 18 to 24 hours for your sealant to cure.
Step 10
With your first layer of sealant cured, you may begin installing your grout. You would begin by mixing your grout in a bucket to the proper consistency.
Step 11
Apply your grout using the grout float one section at a time, starting in a corner. Generously apply the grout to get in between every stone.
Step 12
Wait for around 30 minutes for your grout to dry.
Step 13
With your grout dry, use wet sponges or cloths to remove all the excess grout from your stones. This process will need to be repeated many times to remove all the excess grout.
Step 14
Wait for 24 hours for your grout to fully cure.
Step 15
With your grout fully cured, you may apply your second coat of sealant.
Step16
Once your second coat of sealant has fully cured, you may remove the duct tape on your floor drain, clean up, and enjoy your new floor!
How to Maintain a Pebble Shower Floor
- Keep your floor clean by using a sponge or cloth soaked in water and soap to remove any mildew or hard water buildup. This cleaning process should be done every one to two weeks.
- Stay away from any harsh chemicals when cleaning your shower’s floor.
- If you have tough hard water stains or tenacious grout stains, use a mixture of white vinegar and water to remove them as soon as possible.
- Reseal your floor every 6 months to a year as required.
- Keep your shower as dry as possible.
- Shake out your shower curtain after a shower and leave the shower curtain or door open to help dry your shower.