Installing a bathroom fan in a drop ceiling is not much different than installing a fan on a flat ceiling.
Although there are a few critical differences in the installation process, you shouldn’t have too much trouble putting a fan into your drop ceiling.
Whether you’re an amateur DIY enthusiast or a more experienced craftsperson, this article contains some crucial information to help you get this job done more quickly and efficiently.
Read on to learn all you will need to install a fan on your drop ceiling so that it will fight mold and water damage for years to come.

Can You Put a Bath Exhaust Fan in a Drop Ceiling?
Building codes and regulations vary in different areas, so it’s always best to consult the local codes in your area to be sure your installation is up to code.
But generally speaking, many areas will not allow you to install a ceiling fan any lower than 7 feet from the floor.
So the height of your drop ceiling will play a big part in whether or not your bathroom fan passes inspection.
Best Position for a Bathroom Fan on a Suspended Ceiling
The best position for a bathroom fan on a suspended ceiling will not be the same for everyone.
Factors like the size of your bathroom, the size of your fan, and the location of your ductwork will all play a part in deciding the best position.
Also, whether you have an inline or standard exhaust fan limits where it can be installed.
For best airflow, you will want the fan positioned in the middle of the bathroom.
If you cannot position it in the middle of the room, then installing it closer to the bathtub/shower is usually the next best option.
How to Choose the Best Bath Exhaust Fan for a Drop Ceiling Installation
The most important thing to consider is how well the fan can ventilate your bathroom.
This is measured by the fan’s CFM (Cubic Feet Per Minute), which is how much air the fan can suck in based on the size of your space.
So for a bathroom that’s 60 square feet, you need a fan with a minimum of 60 CFM.
The next important consideration is how loud the fan is when it runs. Noise level is measured by sones.
Most people are satisfied with fans under 1.0 sones, but there are some models that can get as low as 0.3 sones.
Other things to consider are energy efficiency, additional features, looks, or aesthetics.
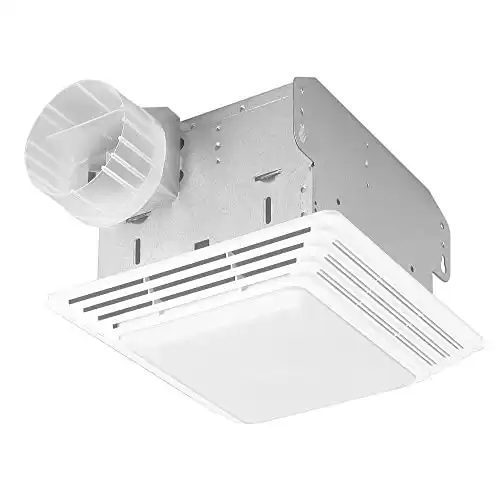
A great all-around fan is the Broan-NuTone 678.
- Easy Installation
- Safe & Efficient
- Built-in Light
This exhaust fan and light combo helps reduce foul smell and is powerful enough for bathrooms up to 45 sq. ft.
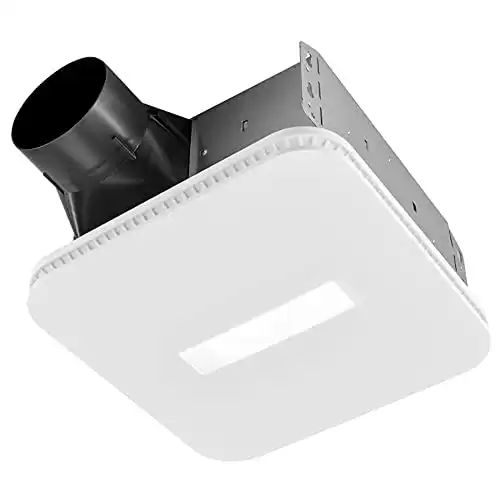
For a larger bathroom, the Broan-NuTone AER110CCTK can accommodate a space that’s up to 105 square feet.
- Easy Installation
- Ultra Quiet
- Customizable Lighting
Fan operates at a powerful 110 CFM for ultimate ventilation in spaces up to 105 sq. ft. and is motor engineered for continuous operation.
How to Install a Bathroom Fan in a Suspended Ceiling
Tools You Will Need
- Drywall Saw or Jigsaw
- Tape Measure
- Pencil
- Screwdriver
- Crimping Tool
- Clamps
- Wire Cutters
- Wire Nuts
- Eye Protection
Step-by-Step Installation Guide
1. Choose the Position for the Fan
After you have chosen your new exhaust fan, it’s time to decide where you will install it.
The placement of your bathroom fan is important. You should have it as close to the middle of the room as possible.
But also be mindful that if you’re installing an inline fan, you will need to connect it to your joists on a dropped ceiling.
2. Cut the Hole
With the right spot chosen for your new exhaust fan, measure the fan just below the cover, allowing the cover to protrude from the ceiling.
Use a pencil and some type of straight edge to mark the ceiling for your hole.
With your markings made, put on some eye protection and bring out your jigsaw or drywall saw.
Take care to follow the markings exactly when cutting and watch out for falling drywall.
3. Attach or Mount the Fan
With your hole cut, it’s time to attach or mount your fan.
Again, depending on the type of fan you have (inline or standard) and even the specific manufacturer, your installation method may be different.
In any case, you will need to attach the ductwork from the fan to the ductwork in your ceiling.
The ductwork is usually attached with a hose clamp requiring a screwdriver.
In suspended ceilings, you will need to connect the suspension cables to your fan using clamps and a crimping tool, then connect those cables to the ceilings hangars.
Once the fan is in place, you can cut any excess suspension cable.
4. Wire the Fan
Before you start wiring, you should make sure all the electricity running to the fan is shut off.
If you are uncomfortable working with electricity, hire a professional or friend with electrical knowledge to complete this part of the job for you.
You will need to follow the manufacturer’s instructions exactly on how to wire the fan using wire cutters and wire nuts, along with creating an electrical connection to your bathroom’s light switch.
5. Test Your Fan
With everything connected, the final part of this job is to test the fan.
Turm your electricity back on and flip the switch. If your fan does not turn on, you will need to go over your electrical connections again to resolve the issue.
But if everything is working fine, then the installation is complete
FAQ
Yes, most bathroom fans have a cover that you can remove and paint without issue. However, you should not paint the fan’s motor, blades, or other moving parts.
Bathroom ceiling fans were manufactured to be on the ceiling. Certain fans will do fine when installed on a wall, but others will not. It all depends on how they were made. There are fans specifically designed to be on walls that would better suit that purpose.


