Does your bathroom fan cover clash with your beautiful bathroom remodel?
Painting it might be the solution you’ve been looking for!
Learn how to choose the right paint for a moisture-prone environment and how to easily paint a bathroom exhaust fan cover.
Should You Paint or Replace Your Bathroom Exhaust Fan Cover?
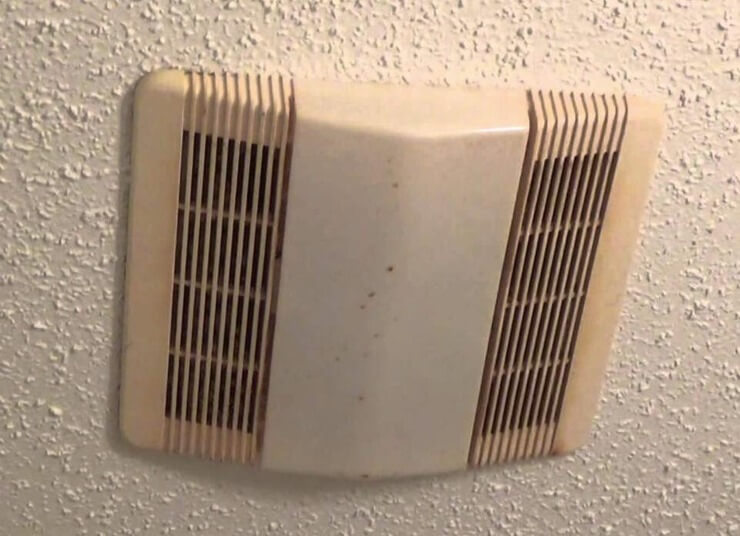
Take a hard look at the cover of your exhaust fan.
Does it have cracks, or is it very old?
There is a point when the paint will not cover up the blemishes and damage of old age. In that case, you are instead better off replacing the fan cover.
On the other hand, if your bathroom fan cover is somewhat aged but is still in good shape, then painting it can save you money over buying a replacement.
Exhaust fan covers can last a very long time. A fresh coat of paint might be exactly what your fan needs to look brand new.
It will be up to you to decide whether you are best off painting your exhaust fan cover or replacing it.
Things to Consider Before Painting a Bathroom Exhaust Fan Cover
Aesthetics
Painting your bathroom fan’s exhaust cover is primarily for style as it doesn’t really provide any other benefits.
So aesthetics are important.
You will want to look at the colors that make up your bathroom, especially your walls and ceiling.
There are numerous paint color options available to you.
It pays to take time and go over all possible color choices to find what would suit your bathroom best.
It’s also good to look at colors and the actual materials that make up your bathroom.
Paint
Besides color, you need paint that works well in a high-moisture area like the bathroom.
When it comes to the best paint for bathrooms, the battle is between oil and latex paint, with latex paint usually being the better choice.
Oil paints are very durable and can stand up to some moisture but can be difficult to clean and take much longer to dry compared to latex.
You will also want to consider the paint’s finish.
You will want to avoid flat finishes and choose a glossy or semi-gloss finish for a bathroom.
This is because these finishes are easier to clean and are better at handling moisture.
Fan Cover Material
Bathroom exhaust fan covers are primarily made out of either metal or plastic.
However, paint does react differently to metal and plastic in some subtle ways.
In different lighting conditions, especially if you have sunlight coming through a window, you will notice different shades of color on a painted metal surface.
Also, some claim that paint is easier to rub off of metal before the paint has fully dried, leading some to believe that plastic is easier to paint.
The main concern you should have is when buying your paint as some paints are made specifically for plastic or metal, and if you use the incorrect paint, you could have issues like adhesion problems or discoloration.
How to Paint a Bathroom Exhaust Fan Cover
Tools You Will Need
- Screwdriver
- Paintbrush
- Paint or Spraypaint
- Painters Tape
- Plastic Sheeting
- Dust Mask
- Eye Protection
Step-by-Step Guide
- Remove Your Bathroom Fan Cover
While you can paint your bathroom fan cover while it’s on your ceiling, it’s much easier to remove it first.
This also prevents you from damaging your fan’s inner workings with paint.
Remove your bathroom fan’s cover by unscrewing it from the ceiling with a screwdriver.
Other fan covers may require you to pull the cover off by hand and then un-attach wires that hold the cover onto the ceiling.
It’s best to wear a dust mask and some eye protection because you will likely release a lot of dust into the air when removing the cover.
- Prep Work
You’ll want to clean your bathroom fan’s cover.
This can be done in many ways but submerging it in water and then using a clean cloth and soap is usually the most effective.
Cleaning and then drying your bathroom fan cover will create a good surface for the paint to adhere to.
You will need a flat surface to paint on, such as a table.
Cover your surface in plastic sheeting and secure the sheeting with painter’s tape.
You can also use something like a newspaper if you don’t have any plastic sheeting.
- Painting Your Bathroom Fan Cover
Place your bathroom fan cover on your prepped surface and begin painting.
You can use a small brush and paint by hand or use spray paint.
Follow the instructions given with the paint you purchased.
You may have to use a primer or additional coats of paint to complete the process.
- Finishing Up
Follow the drying instructions given with the paint you used. Most paints take between 1 to 8 hours to dry.
Once your bathroom fan cover is completely dry, you can remove the painter’s tape and throw away the plastic sheeting.
The last thing you’ll need to do is to re-attach the cover back onto the fan.